Contact
Skip to main content

An increasing number of companies decide to set up an innovation lab, accelerator programme or external startup hub. It seems they are trying to compete at a changing market. A market where well-known and experienced companies find themselves behind disruptors from the makers world and startup culture. But is this really the way to go? Often, an innovation lab is not even necessary. With Lean experiments, everyone is able to innovate. And it is easy to implement within your company, department or team.
If you want to compete in a market where the rules constantly change, you have to be fast and agile. That way you will be relevant and stay relevant to clients. Startups no longer just compete with the establishment, they can really put them in trouble. They succeed with a smaller budget, but how? It’s not just about a quick time to market: reaction time and reactive power are of the utmost importance. You will need a different mindset for that. Listen well and improve all the time, together with your clients.
Lean experiments help you to:
- transform vision to facts;
- discover if something does or does not work;
- decrease the risks and uncertainties.

Alright, so startup companies play by different rules. They are naturally good at experimenting, which is partly a result of evolution: it is the core of their existence. But how do they do it and what is their secret? Startups will constantly put their findings to the test with clients. If their assumption proves to be false, they do not see it as failure. Discovering what doesn’t work is considered a success. A startup will respond immediately and adapt (pivot). This can even happen several times a day.
It’s not that weird that many companies choose to start a new label or sister company, with the mission to disconnect from the main company and react to what’s happening on the market. And that’s a fine solution. However, it’s also an option to apply the rules of the game to your own department or team. We’ll get you started by explaining them to you.
1. It’s OK to make mistakes.
You’ll learn from them. Messing up early in the process will save you money later.
2. Don’t be afraid to learn.
This will only work if you really test your product to actual clients. That means you’ll have to face the music. Show your clients things that are still unfinished, are not up to standard yet, or even embarrassing to you.
3. Failure also means success.
You can’t predict the future. And that’s OK. But by experimenting, you will sooner learn what works and what doesn’t. And that is valuable as well.
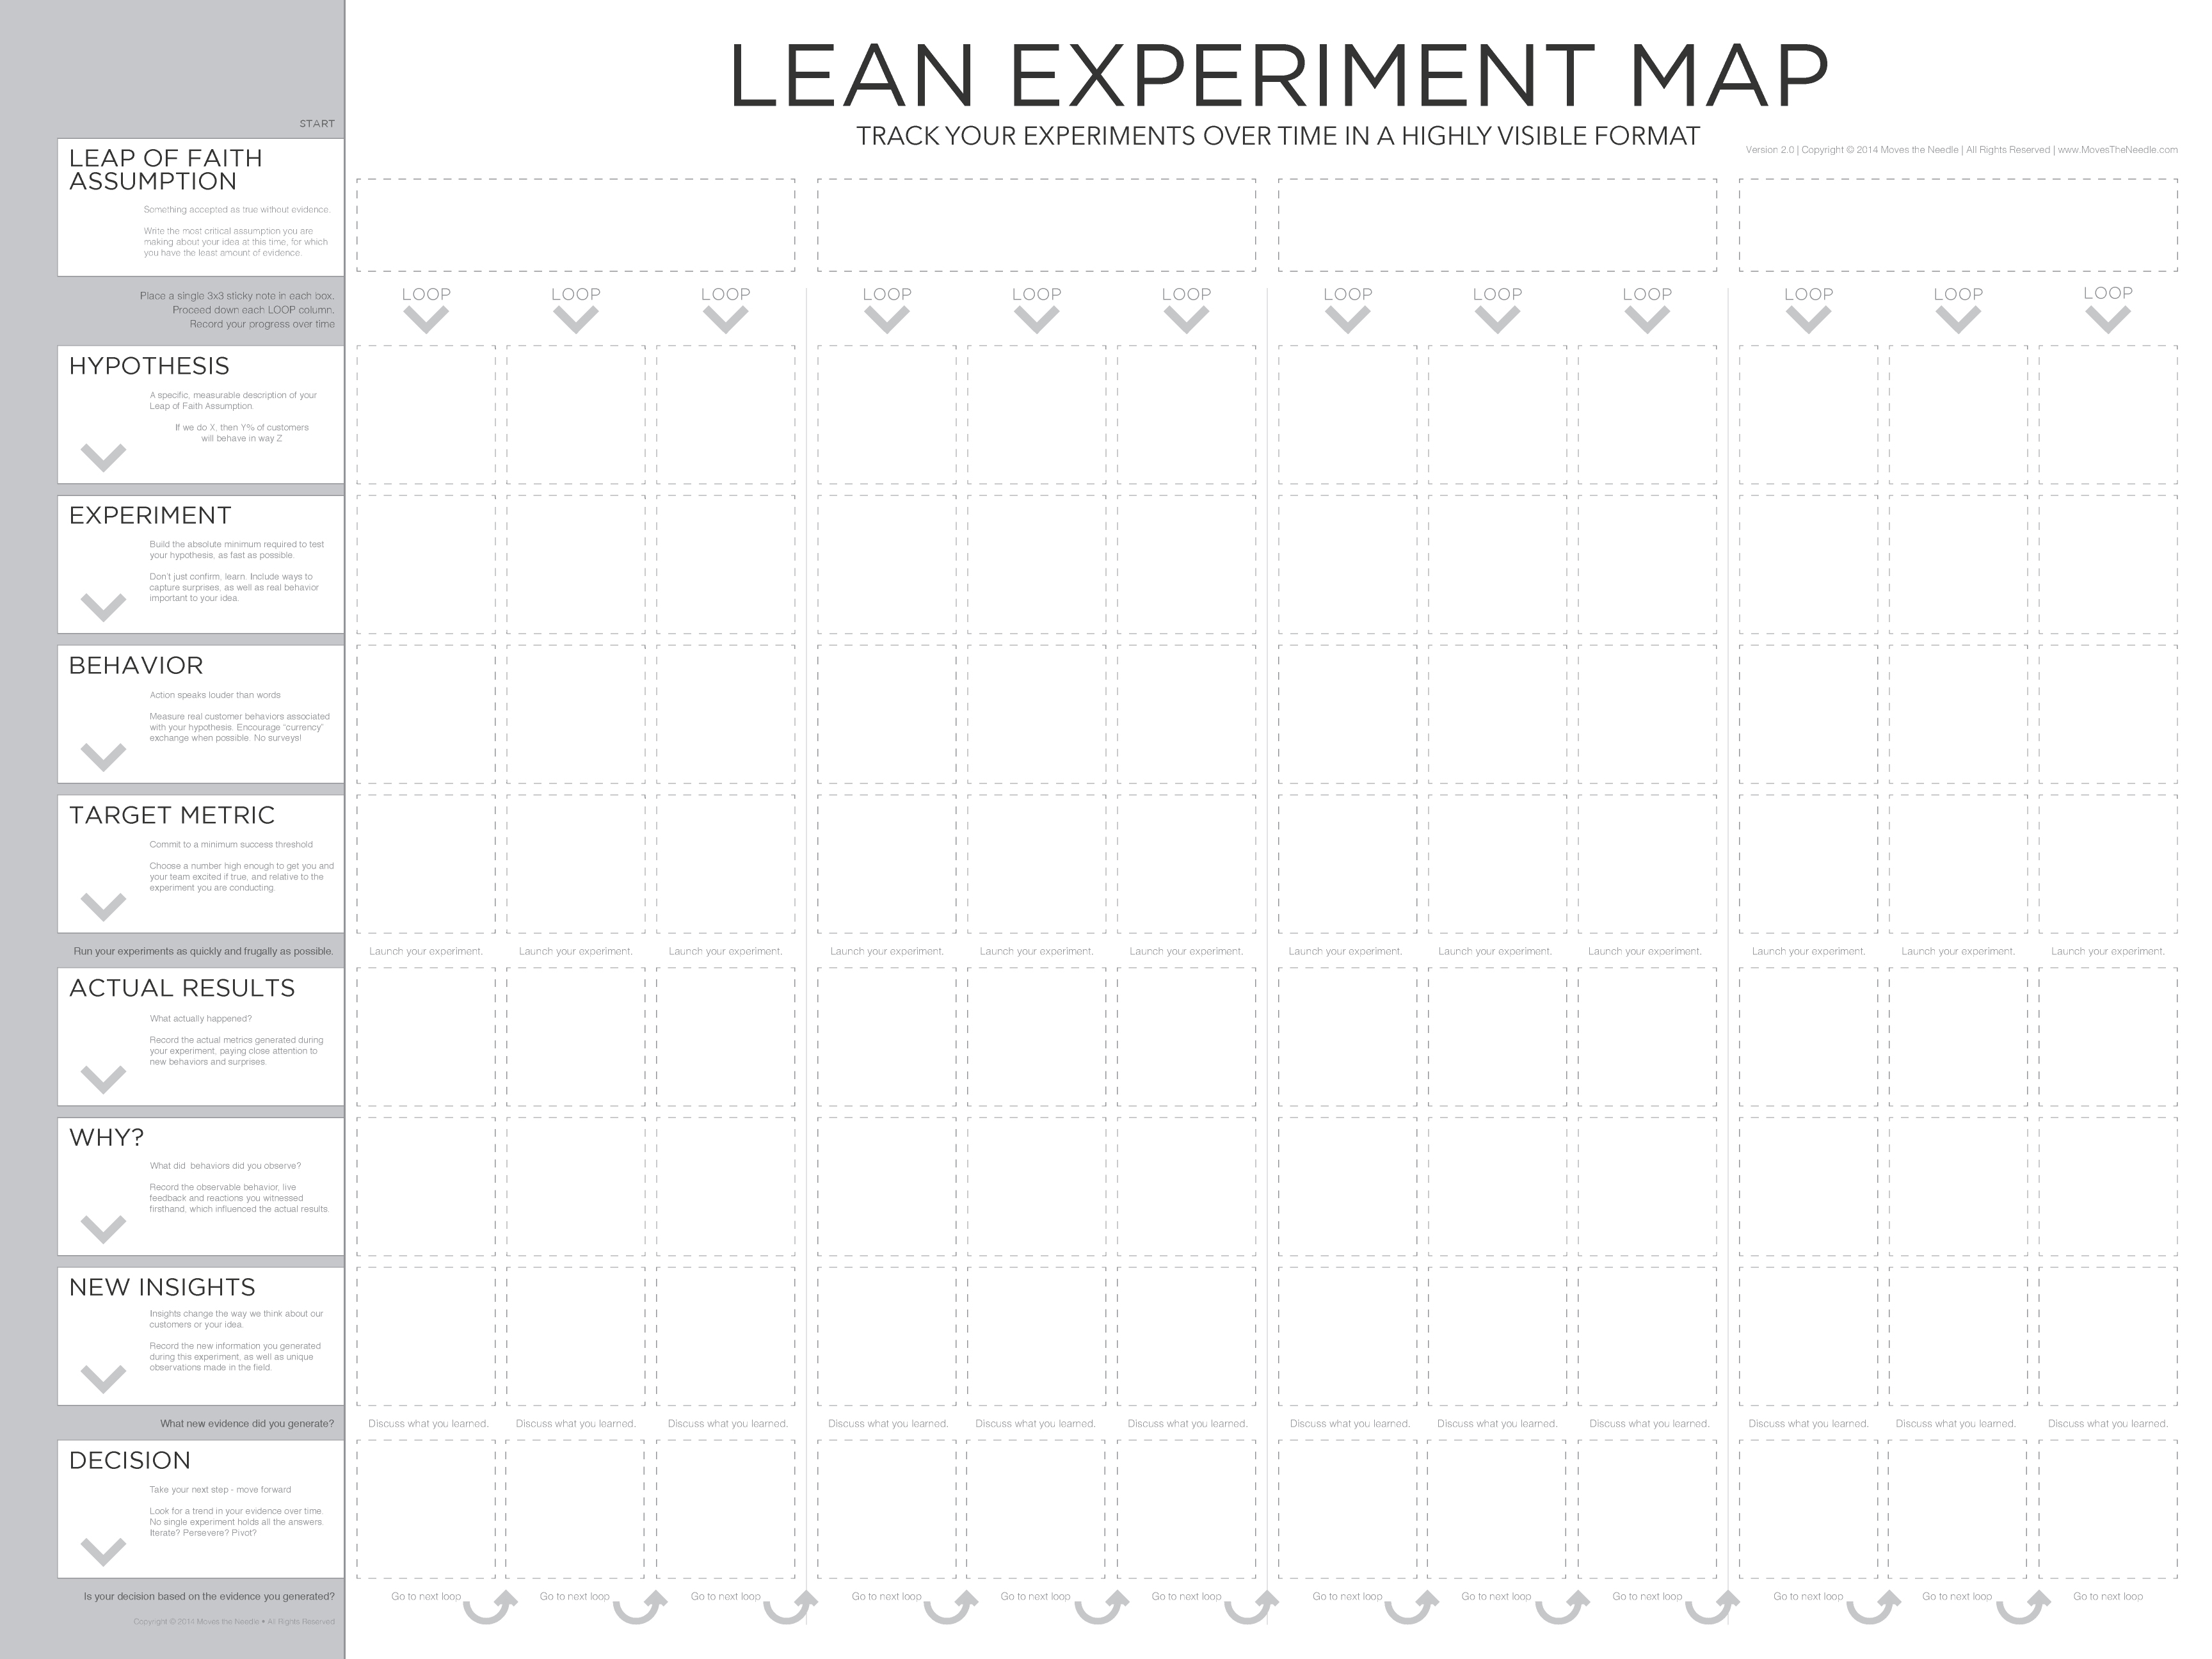
It’s time to get to work! With the steps below, you’ll quickly set up your own Lean experiment. We promise it’ll be addictive. You can use the experiment map to make the progress of your experiment visible. That way, you’ll immediately have a useful communication tool at your disposal.

1. Who are your clients? (15 minutes)
Do you know who your clients are? Do you know their fears and needs? Write down your assumptions in ad-hoc personas. Validate your assumptions during the experiment and make your personas more comprehensive.
2. Make the problem explicit (15 minutes)
What problem are you trying to solve? Is it an existing problem? How does your audience solve the problem now? Use a storyboard to create a ‘before and after’ scenario. That way you are able to visualise the problem and the possible solution for the entire team.
1. Brainstorm (10 minutes)
Write down all assumptions for your idea and note the expected reactions. It’ll help to think about the minimum requirements for the idea to work.
2. Prioritise your assumptions (10 minutes)
Use a 2×2 matrix for this. We often use the criteria ‘critical vs. noncritical’ and ‘known vs. unknown’, but you can use something else, of course.
3. Choose the assumption with the highest risk (5 minutes)
If done correctly, the quadrant on the upper right corner shows the assumptions with the most risks involved. You and your team should now decide which assumption is the most risky and should be tested first.
4. Form your hypothesis (5 minutes)
Turn the most risky assumption into a hypothesis. A hypothesis is just a fancy word for a guess. You can use this format: If we do [assumption x] for [persona y], [z] will happen. It’s important to make your hypothesis real and measurable. For instance: If we offer a free whitepaper to marketeers, 50 percent will be willing to leave their email address.

1. Brainstorm (10 minutes)
Think of as many ideas as possible to validate your hypothesis. Be creative! It’s not necessary to build a complete product to test your assumptions. Sometimes, a storyboard or powerpoint presentation will be enough to validate your hypothesis.
2. Choose an experiment
Select the experiment with which you can test your hypothesis the quickest and cheapest. Be realistic: you want the experiment to feel real for the client. His reaction and behaviour will be realistic, then. Need examples? Chris Bank has some.
3. Determine the criteria for success
Before you start, make sure you determine when the experiment will be successful. For instance: when 10 percent of the marketeers has downloaded a whitepaper. Write down what kind of behaviour you expect and make sure it’s measurable. For example: 1) visits landing page 2) fills out form 3) opens e-mail 4) downloads whitepaper. If you want to measure the exact interest, you should ask for something in exchange: time, money or data. That increases the chance that the behaviour during your experiment meets reality.

1. Get to work
Time to introduce the best part: getting out of the building. Find your audience and conduct your experiment. Remember: you’re looking for honest responses from clients. Do not tell them it’s an experiment.
2. Collect feedback
Take notes of all things you’re learning. Focus on the behaviour. Look into why it is happening as well. Don’t just take notes of your experiment. Write down the observations, surprises and feedback as well. Did you meet your criteria for success? Why, or why not? What did it teach you? The data you collected in this period of time will help you to make the right decision later on.
3. Time-box
You’ll need to decide how long your experiment will run before you start it. Stick to it. It’s tempting to break off your experiment sooner when the results do not come, or to let the experiment run when it’s successful. But don’t fall for that, keep your experiment transparent. The target is to learn quickly. You can always set up another experiment later.
1. Retrospective (10 minutes)
What did the experiment teach us? How did the clients react? What went well? What could have gone better? Was the hypothesis right? Let’s show the proof! Discuss the results and write down new insights. Start with what you’ve seen (the observations) and explain why it happened, together. During this phase, debate will arise whether or not the experiment has succeeded. That’s OK. It can be useful to use the debate to form new hypotheses. New assumptions will be visible straight away.
2. What’s next?
Based on your proof, there are two possible results. Either your hypothesis is correct or it isn’t. What’s next? Do you continue with what you’ve chosen? Do you need more proof to make a final decision? Or do you feel you should choose a whole new direction (pivot)? Decide the next steps: form a new hypothesis and tackle the next risk.
Do not overreact
Start out small: set up a test for an email campaign or the landing page you’re creating. It’s an ideal tool to quickly test your proposition. Use that which works for you and don’t hesitate to adjust what’s not working. An experiment does not have to take weeks. Sometimes, a few minutes can be enough.
Important:
– Decide what your assumptions are on beforehand.
– Test if those assumptions are correct.
– Make decisions based on facts.

Excited to get started? We have a free toolkit you can download, with all the tools you need to set up your lean innovation project. Looking for A1 prints of the canvas? Just give us a shout and we bring them over.


